Mobile:+86-311-808-126-83
Email:info@ydcastings.com
stages of sand casting
Stages of Sand Casting A Comprehensive Overview
Sand casting, also known as sand mold casting, is one of the oldest and most widely used metal casting processes. Its popularity stems from its versatility in manufacturing complex shapes and its cost-effectiveness for both small and large production runs. Understanding the stages of sand casting is essential for anyone involved in the metalworking industry, as each stage plays a critical role in ensuring the quality and integrity of the final product.
1. Pattern Making
The first stage of the sand casting process is pattern making. A pattern is a replica of the final object that will be produced. It is commonly made from materials such as wood, metal, or plastic and is designed to create a cavity in the sand mold that accurately represents the dimensions of the final product. The pattern must be slightly larger than the final product to account for material shrinkage during cooling. In this stage, considerations for features like draft angles (slight inclines on the pattern) are also made to ensure the ease of removal from the mold.
2. Molding
Once the pattern is ready, the next stage is molding. In this stage, sand is mixed with a binding agent (usually clay) and water to create a mold material that can hold its shape. The mixture is then packed around the pattern, often using two halves to form a mold. The pattern is carefully removed after the sand has been compacted to create a cavity. A key point during this stage is to ensure that there are no air pockets, which could lead to defects in the final casting. Molding also involves creating gating systems, which are channels that will allow the molten metal to flow into the mold.
3. Melting and Pouring
stages of sand casting
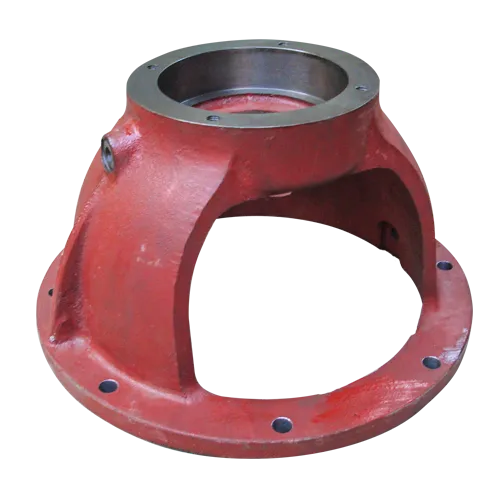
After the mold is prepared, the next step is melting the metal. Different metals such as aluminum, iron, or bronze have different melting points and require specific furnace types for melting. Once the metal reaches the right temperature and is in a molten state, it is poured into the mold through the gating system. The pouring process must be controlled to minimize turbulence and prevent contamination of the metal. This stage is critical, as improper pouring could result in defects such as air holes or uneven distribution of the metal.
4. Cooling
After pouring, the molten metal needs time to cool and solidify within the mold. The cooling time can vary depending on the type of metal and the thickness of the casting. During this stage, it is essential to monitor the cooling process, as uneven cooling can lead to warping or cracking. Once the metal has cooled sufficiently, the mold can be broken away to reveal the casting.
5. Finishing
The final stage involves finishing processes that refine the casting. This includes removing any excess material (known as flash), smoothing the surface to eliminate rough spots, and machining to achieve precise dimensions. Additional treatments, such as heat treatment for improved mechanical properties or coating for corrosion resistance, may also be applied during this stage.
In summary, the stages of sand casting—from pattern making through molding, pouring, cooling, to finishing—play crucial roles in determining the quality of the final product. Understanding each stage helps in troubleshooting potential issues and ensuring the production of high-quality castings. As industries continue to evolve, sand casting remains a fundamental process that effectively combines tradition with modern technology.
-
Why Should You Invest in Superior Pump Castings for Your Equipment?NewsJun.09,2025
-
Unlock Performance Potential with Stainless Impellers and Aluminum End CapsNewsJun.09,2025
-
Revolutionize Your Machinery with Superior Cast Iron and Aluminum ComponentsNewsJun.09,2025
-
Revolutionize Fluid Dynamics with Premium Pump ComponentsNewsJun.09,2025
-
Optimizing Industrial Systems with Essential Valve ComponentsNewsJun.09,2025
-
Elevate Grid Efficiency with High-Precision Power CastingsNewsJun.09,2025

